
Your first 15 minutes in Reposha
The fastest way to learn Reposha is to be your own Client once. You send a request to yourself, upload a file from your phone, and watch it land in the right folder.
You will need: your laptop and your phone with WhatsApp.
Time: about 15 minutes.
At a glance
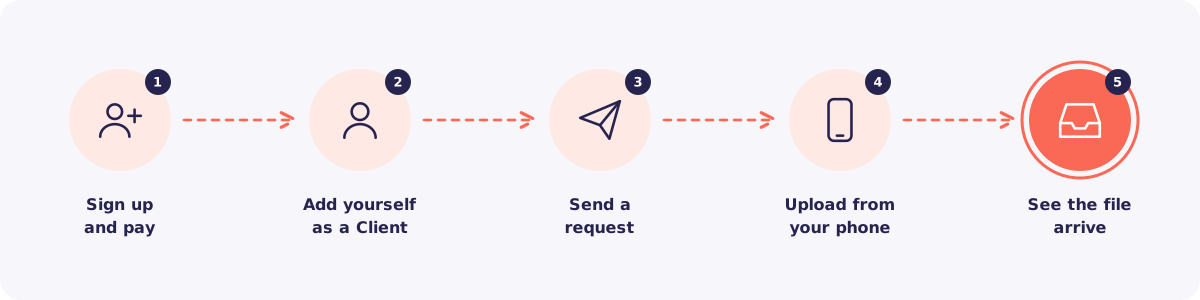
Step 1. Sign up and pay
Choose a plan on reposha.com and click Choose plan. Then fill in your name, email, password, firm name and practice type.
Next, enter the 6-digit code we email you. After that, complete the payment. You land straight on your dashboard.
Good to know: Your first payment has a 14-day money-back guarantee. Your logo and brand colour come later, from Settings.
Step 2. Add yourself as a Client
Go to Clients and click Add Client. Enter your own name and your own mobile number.
Then assign the Client to yourself. You are already on your team as the Owner, so your name is in the list.
Step 3. Send a request to yourself
Go to Requests and click + New request. Pick yourself as the Client. Then pick any checklist, for example ITR (salaried).
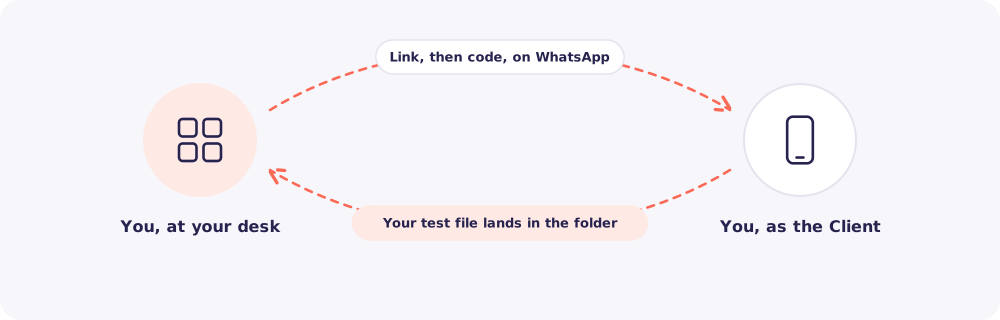
Click Create request. On the next page, click Send link on WhatsApp and send it to your own number. Then click Send code on WhatsApp and send the code too.
Step 4. Upload from your phone
Open WhatsApp on your phone. Tap the link in the first message. Then enter the 6-digit access code from the second message.
Next, tap any item on the list and choose a photo or a PDF. Wait for Received. You also get a receipt with a reference number.
Step 5. See the file arrive
Go back to your laptop. Your file is waiting in Files to review on the dashboard. It is also inside your test Client's folder.
Open it once. Then go to Activity. You will see your own upload and your own view, each with a time.
That's the whole loop. Your Clients will go through exactly the same steps.
Tip: Delete the test Client when you are done, so it doesn't sit in your Client list.
Then set up the rest
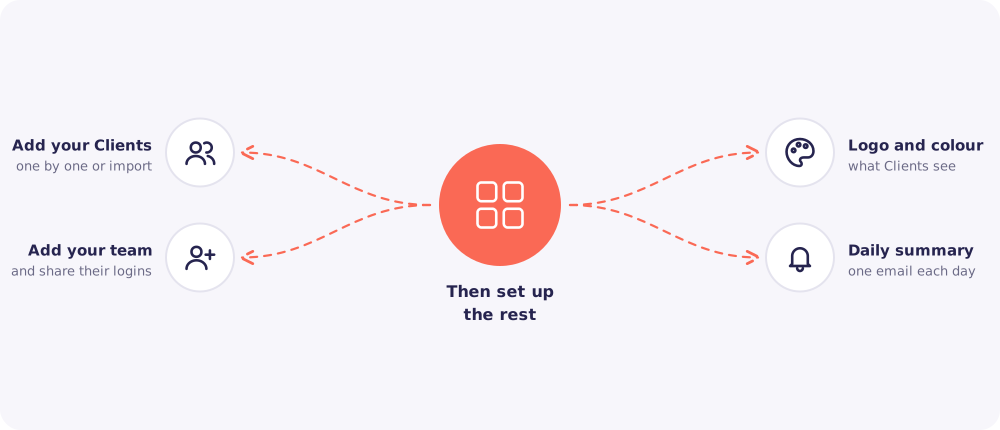
- Add your Clients. Add them one by one, or import a spreadsheet.
- Add your team. Create a login for each person and share it with them.
- Add your logo and colour. Your Clients see them on their upload page.
- Choose your daily summary. New uploads always show in the bell. Decide whether you also want one summary email each morning.
Quick answers
Will my test upload count against my plan? The test Client counts while it is in your list. Delete it after the test.
Can I see the upload page without sending myself a request? No. The upload page always opens with a link and an access code, just like it does for your Clients. That is what keeps it safe.